Hands-on #2
 Sample 1
Sample 2
Sample 3
Sample 2 demonstrates how Glossy simplifies translation of web pages.
4. Start working on a web page
You have received a
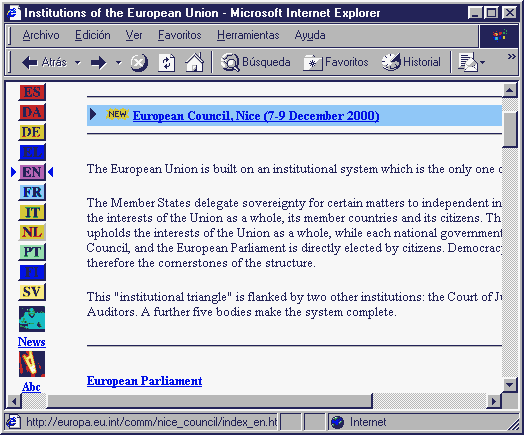
web page. Job description: translation from English into Spanish. The page looks like
this:
Open Microsoft Word. Glossy
automatically analyses the HTML code and identifies all the text
that needs to be translated.
After a few
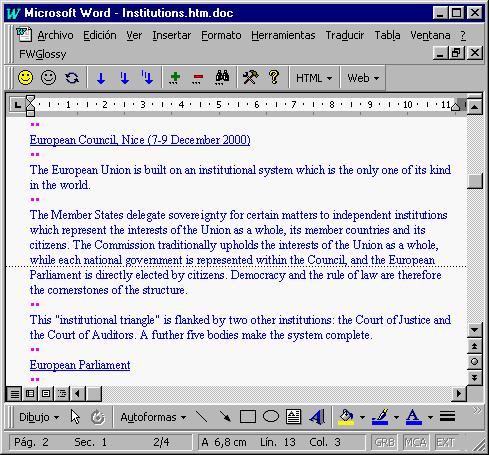
seconds you will be presented with a new
Word document. This new document contains all the text you need
to translate (blue colour). Text segments are clearly delimited (two small
pink dots).
Hyperlinks (URLs) are underlined for informational purposes.
5. Translating the web page
Not much to
say here ! Simply translate one text block after the other -
it's just normal text.
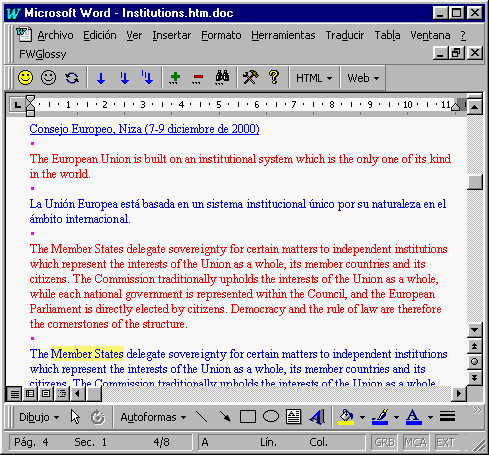
You want to compare the source text with your translations? No problem!
Click on a button and
Glossy will display the original texts in red colour on top
of your translations. Proof-reading made easy!
6. Preview translations
Now that we have translated the first few
text segments we want to check how all this looks like in the browser.
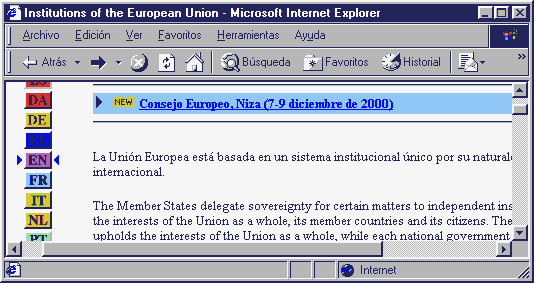
This is what the Glossy Preview option is for. Take a
look at the screen below: the URL and the first paragraph appear in
Spanish, the rest has not yet been translated.
At this point you are
probably saying to yourself "how simple web page translation can
be!": No HTML code to understand, no special purpose editor,
browser previews only a mouse click away, etc. Well, this is how
Glossy works (and why should it be more complex anyway?)
7. Advanced features
If you are an HTML savvy user
then you can get access to the raw HTML code as well.
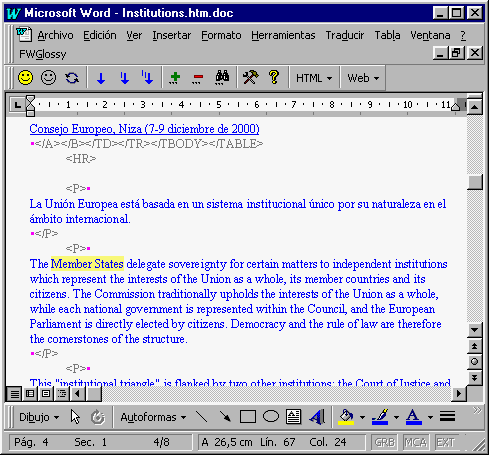
Under certain circumstances this display
mode can be very useful, e.g. if a page
contains JavaScript code displaying a message to a user. Select the message
with the mouse, click on a button and Glossy will "convert" it into
blue translatable text. Hide the HTML code and continue
translating.
Go to next sample...
Go to previous sample...
| 

